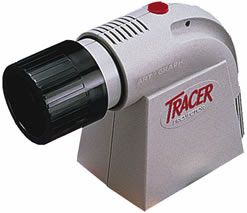
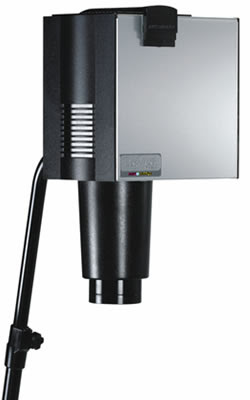
 An opaque projector can be a wonderful tool to enhance your creativity and a life-saver when you need to make a difficult enlargement of an artwork in a hurry, but it's a temperamental beast that can also be quite frustrating to work with if you don't know the best way to approach it.
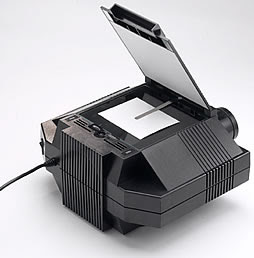
The basic concept is simple: You place a reference image on the glass plate, turn on the light and adjust the focus and distance from the surface you want to transfer the image to. So, it allows you to take a small image (a preparatory sketch for example) and project it at a much larger size onto a canvas or other surface. Then you can trace the projection onto the surface with a pencil and get a very accurate rendering of the original image, only bigger.
Sounds simple, right? Well, we don't mind saying that we've run into a few customers at BINDERS who were less than enthusiastic about the results and that's because they didn't know the rules that the projector lives by. Fortunately we were able to help them out and we'll do the same for you right now!
Rule #1: Use Line Art for Your Reference Image.
Opaque projectors don't handle color or value gradations well at all, so the best reference image is a high contrast, black-and-white image, such as a drawing done with black ink or a dark pencil — any sketch or preparatory drawing that uses contour lines will work just fine. Ink would be preferable here, since the graphite would smudge on the glass plate and require you to clean it before each session.
The most common complaint about these projectors is that photographs look terrible in the projection, which is a true and unalterable fact. SO, if you want to enlarge and transfer a photograph onto your canvas, we recommend using a piece of tracing paper to create a preparatory drawing that includes only the main contour lines of the photo image, ignoring light and dark values and color completely. Then place the traced image on the projector and copy the lines onto your canvas. Once you have the contours transferred, you can work the values and colors directly on the canvas, using the original photo as a reference, but you will have solved the problem of placement and scale of everything in your painting before you begin!
Rule #2: Work in a DARK Room!
In order to show crisp lines that are easy to trace, you'll need to work in the darkest possible room you can find. Make sure that the projector is the only light source in the room and you will save yourself many headaches! Plus, it's always fun figuring out how to hold your pencil to the surface and keep from blocking the light at the same time!
Rule #3: Make Sure Your Reference Image Is Small Enough.
 The projector will give you a sharp, clean image of whatever is on the center of the glass plate, but it gets progressively fuzzier towards the edges of the plate. Use an image that is smaller than the glass plate and you will get the clearest projection. For example, our Artograph Prism Projector has a 7x7 inch glass plate, so we make sure that the reference image that goes into it is never greater than 5 inches in height and/or width. With the drawing never being closer than an inch from the edge of the plate, we always get a clean, sharp projection.
You say your reference image is too big? We solve that problem by scanning the images onto our computer and then resizing them to 5 inches or less. Print the image out at the new size and you're ready to go! Any image editing software, like the one you use for your digital camera, should have resizing capabilities.
Rule #4: Be Gentle When You're Tracing!
Once your projection is happening and you're ready to start transferring the image onto your surface, make sure you draw lightly with the pencil to avoid moving the surface in any way. You can also invest in a sturdy easel or some other kind of support. If the surface you are tracing the image onto moves around at all, the image will become distorted and you will find that your lines no longer meet up. This is a particularly big problem with stretched canvas, which is flexible enough that it moves very easily. So, place your surface on a solid easel or hang it directly on a wall and draw lightly over the projection.
 We hope that, for those of you who already own an opaque projector, this set of rules will help you to get the most out of your equipment. The projector is a powerful tool that can streamline your workflow tremendously - we know we're never going back to the days of drawing a grid and copying the reference image square by square! As long as you work with it in the way it works best, your opaque projector will give you great results every time.
If you don't own a projector, but this article has made you think you might like to have one, we encourage you to stop by BINDERS and have one of our expert sales associates show you our selection. We have a range of models, from the economical Tracer Junior — which is great for young artists — to our professional-quality selection by Artograph.
Next week: An Interview with Anne Elser on Calligraphy, Bookmaking and Life!


No comments:
Post a Comment